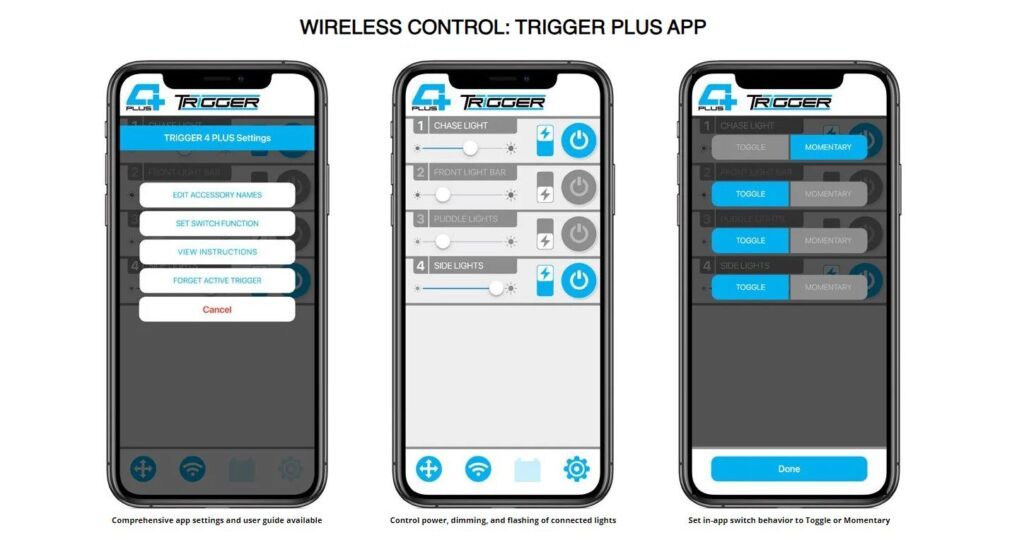
One of the most common questions customers contact us about is how to pair their phone to our free ‘Trigger ACS Plus‘ mobile app for iPhone and Android. In this guide, I will be going over how to get connected so you can remotely control your accessories/lights. This guide has been updated as of late Nov. 2023 with additional steps.
IMPORTANT: Make sure that you have Bluetooth enabled on your phone before following these steps. On your phone, you can do this by going to your main ‘Settings’ app (gear icon), finding “Bluetooth” and making sure it’s toggled on. This step will be important later on, so make sure to enable Bluetooth now.
Our app is called ‘Trigger ACS Plus‘ and it will look like this in the iOS app store on iPhone.
If you’re currently viewing this article from your iPhone, you can click here to download the app.

We’re aware that some Android App users are experiencing issues with compatibility on newer versions AndroidOS, and in some cases cannot find it on the Google Play App Store. Our team is currently investigating and should resolve this soon.
Temporary fix: In the meantime, you can manually download the Android APK file (app) and ‘sideload’ it onto your Android Phone, this is a manual way of installing the mobile app without using Google Play.
Download link Click Here | Alternative link Click Here | Sideloading Instructions Click Here
Google Play app link Click Here
Now that you’ve got Bluetooth enabled and the app installed, let’s go over the steps to pair your phone to the actual Trigger Controller unit that’s under your hood. This guide assumes that you already have a Trigger Controller (4 Plus, 6 Shooter, or Bluetooth Relay) wired up with power running to it from your vehicle.
When you open your app on your phone, you will likely see one of two screens, either a “Select Trigger Device” screen asking you to pick which device you’d like to get started with, or you’ll see a screen with a series of greyed buttons on the right, and usually a flashing number on the bottom left.
If your app looks like the image on the left, simply select the device you want to pair. It may seem counterintuitive, but we will actually be selecting the device to pair, immediately unpairing it, and then repairing it. This may seem odd, I totally understand, but trust the process. We’ll get you reconnected. Don’t skip any steps even if this seems redundant.
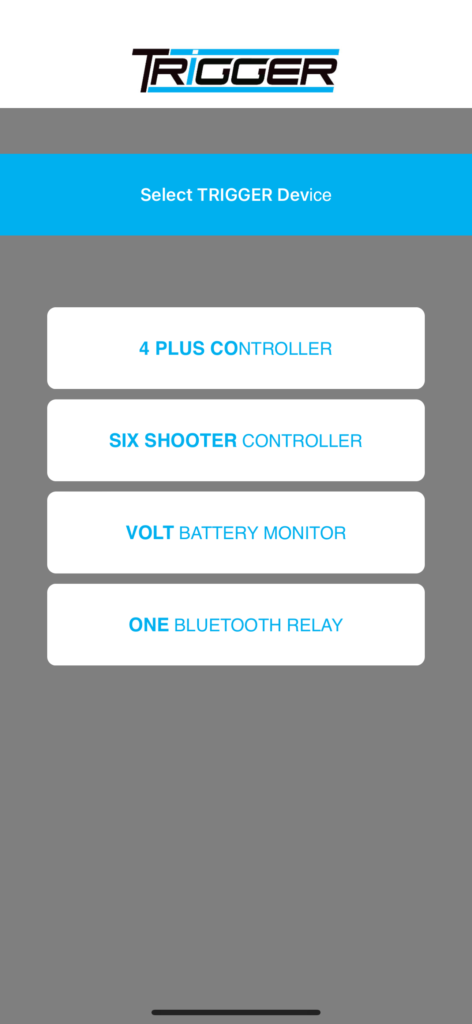
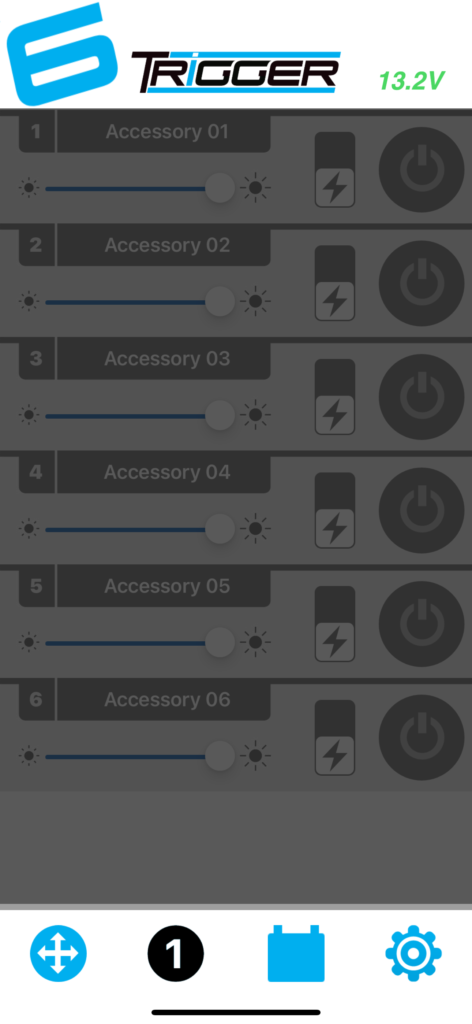
You should now have what looks like the image on the right on your phone screen, from here we’re going to press on that gear icon:

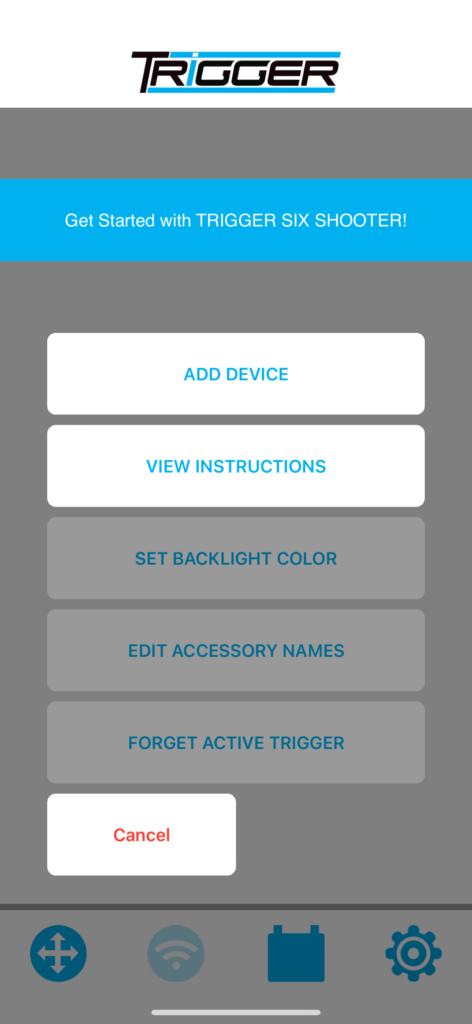
We will select “Forget Active Trigger” from the menu that pops up, and then confirm again by pressing “Forget Device”. It will now take you back to the first screen (image on the left) asking you to select your device again. Now again you will select which device you have from the list.
This time after selecting your product model, you should see this screen with a button that says “Add Device” but don’t press it just yet.
We will now be holding down button(s) on your Trigger Controller main unit (the actual module under your vehicle hood) to tell it to search for the incoming phone signal. Depending on your Trigger model the buttons you will hold down will be slightly different:
Trigger 4 Plus = you will hold down buttons 2 and 3
Trigger 6 Shooter = you will hold down buttons 2 and 5
Trigger ONE Relay = you will hold down the ‘reset’ button on the top of the device
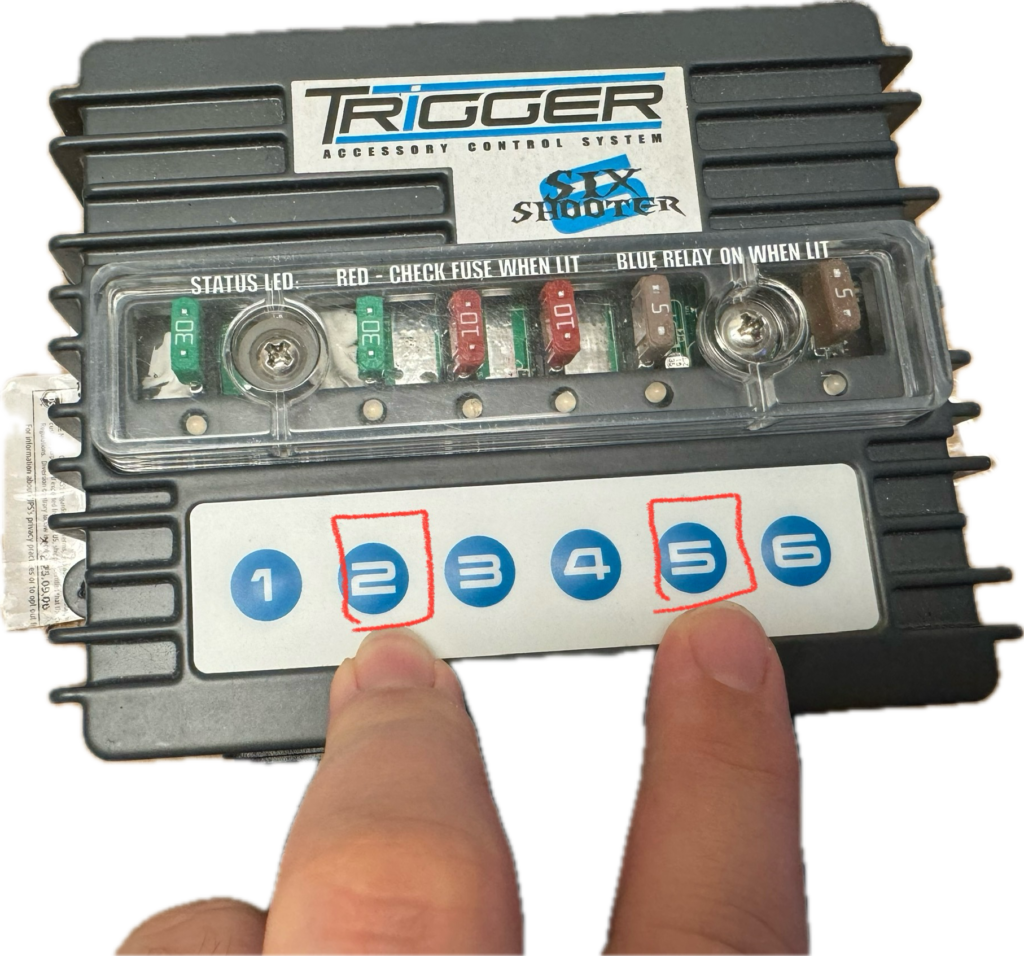
Example of what to press if you have the Trigger 6 Shooter (holding down 2 and 5) to enter pairing mode, will be different if you have the Trigger 4 Plus Model (hold down 2 and 3 instead) or Bluetooth ONE Relay (hold the button on top of the relay)
On Trigger 4 and Trigger 6 it should blink blue about 3 or 4 times and then stop flashing, this is good, it means you’re ready for the next step on your phone. After you’ve held down the pairing buttons on the main Trigger module itself, it will be ready to receive that signal from your phone, and you can press ‘Add Device’ on the phone screen.
If successful, the phone and the Trigger Controller will connect and it should prompt you asking for a 4 digit passcode. By default, this code is going to be 0000 (four zeros), and then after entering that it will ask you to type your own custom code. You can simply type (1234) or come up with your own 4 digit pin that you’ll remember.
After that you should be all paired and connected!
Make sure to test the device and make sure that your wired accessories can be toggled on /off, using the mobile app specifically you can even dim or strobe some LED lights!
In some rare instances, you may have done everything correctly and still not have it connect, we ask that you try the steps again in order. If that doesn’t work, try deleting the app from your phone and re-downloading the app to hard reset it. Double-check that Bluetooth is enabled device-wide on your phone and ensure you’re holding down the buttons long enough for them to flash blue 3 or 4 times on Trigger 4 Plus and Trigger 6 Shooter.
This guide should resolve about 99% of cases, but as a last resort, if you’re still stuck, you can feel free to reach out to us by emailing: engage@aacbrands.com – and we can manually try to assist, or even go through it over a phone call to try and troubleshoot. Please be as descriptive as possible if you send an email, tell us what you tried and what issues specifically you’re having. If you went to power up your Trigger Controller and ALL the lights are stuck permanently blue (on the main module), please reach out and email us as this may be indicative of an issue that requires servicing.
We are open Mon-Fri from 8:30AM to 5:30PM Pacific Time in the office. Messages sent on weekends are typically reviews the following Monday.